Saturday 17 December 2016

Back Into the Vortex


Two years ago I posted "Budget Time Travel : A Photographers Guide" explaining the notion that, at least in sorts of latitudes where I live, winter photography can transform familiar, well worn scenes into something other, providing the photographer willing to brave the cold with an alternative to long distance travel in order to find fresh subject matter. That was written during the winter or 2014-15, the second year in a row in which a weak polar vortex failed to keep arctic temperatures confined to the arctic, allowing them to run amok over the eastern half of North America including the Great Lakes region. Last year though the term 'polar vortex' which was becoming oh so familiar was replaced with 'El Niño', and with it came more mud than snow. While this was a relief in just about every other way, it didn't make for much photographically.

NOAA/NASA GOES Project Image
So here it is, mid-December 2016 and for the third time in four years we're hearing about the polar vortex again. Really I've been hearing the term bandied about since the summer, usually in discussions that started with the old "they say it's going to be a nasty winter" without any mention or probably even conception about exactly who or what "they" are. It wasn't really until just this week when a normal, possibly even warmer than normal autumn suddenly gave way to mid-winter conditions that I took much notice. Not that I or anyone else who lives in this part of the planet had much choice if they had any plans involving stepping outdoors.

As this cold weather snap coincides with that time of year where days are so short I drive both to and from work in the dark it wasn't until yesterday I had some free time during daylight to take advantage photographically. Given this is also the time of year for holiday preparations it was not a whole lot of time though, so with time constraints I decided to stay in town and make the most of my favourite local well trodden subjects, a decision it seems that turns out to have been the right one.

Take the lead image for example. Some readers may recognize the subject as that same crumbling break wall that was featured in my post almost exactly a year ago in "One Subject, Many Approaches II". It also appears in the post just previous to this. Other than being some structure jutting out into the water, with its thick coating of ice it seems almost unrecognizable here. I had actually headed out the door on bright sunny morning to do some shopping but noticing the heavy band of clouds hanging over the lake turned around and collected my Mamiya gear. It was only in the last few hundred metres of my drive out to the lake that the sun became obscured by cloud cover. That came as a bit of a disappointment as I'd been hoping to capture a dramatically sunlight foreground to make the dark clouds over the lake seem even more dark and ominous but looking at it now that might have been too much contrast. The clouds are plenty dark on their own. It only got cloudier the longer I stayed and before long I was having to take measures to keep the falling snow from collecting on my equipment.

I made the mistake of leaving without a good cable release. I had the $5 cheapie that sits at the bottom of the pack as a spare but after an hour or so in the cold that came apart and with the diminishing light as the once distant clouds moved overhead started bringing exposure times uncomfortably low to manually release even with the tripod I decided that shopping I had shouldn't be put off too long. I did manage to slip out again later that afternoon just to finish the last half of the roll that was in the camera.

I guess it's possible that this cold snap may be just the prelude to an otherwise normal winter. If so I was glad I got this chance and there will no doubt be a few more notable days before the season gives way to spring. On the other hand given how things so far are right in line with what the meteorological pundits have been saying, and experience with other recent winters, this may be just the tip of the iceberg.

Finally, for your enjoyment, here's some more from my first photographic foray of the new winter:


Sunday 27 November 2016

What's In The Box Is Outside The Box

It's been a while since I've made a good impulse buy, so I was well passed due for one when I ran across this lot at everyone's favourite auction site (or least favourite depending who you talk to, it seems there are no in betweens). I became the proud owner of five rolls of Svema CO-32d colour reversal film, expired just slightly before the Soviet Union itself, at a price I could easily shrug off if the experiment was a total failure.


It might seem like an odd way to go for someone such as myself who prefers good sized negatives made with excellent optics to produce full range black and white prints. At first blush it may strike you as a better choice for a member of the Holga toting, happy accident fostering, low fidelity image crowd. Though it may strike some as the polar opposite of what I usually go for I don't see it that way. One of the qualities I care about most in my images is character, however it's achieved.

Like many impulse buys however there were a few aspects to this one that might have given me pause had I taken more time to consider things. I knew a colour reversal film from what was then the Soviet Union probably wasn't made for the standard E6 process like the Fujichromes and Ektachromes of the same era, but I didn't think this would be a big deal since I intended to cross process in C41 chemistry anyway. It was only once it had arrived that I started to research my options for processing the stuff and what it turned up suggested a change of plan was needed. I found a thread in the APUG forums suggesting a standard C41 process would strip the image from the film, a suggestion that was corroborated by the scraps of information I was able to find elsewhere in my online searches. One commenter was stated this was simply the result of the relatively high temperatures typical of colour processes and that they'd be fine in C41 chemistry with extended development at room temperature. More numerous, and it seems to me authoritative, were claims that it was the bleach employed in C41 chemistry do in the images resulting in a blank strip of film at any temperature and that C22 chemistry was the only viable option if I didn't care to gather all the ingredients needed to reproduce the original ORWO reversal process, It can be hard enough getting my hands on standard chemistry sometimes and the quest (no doubt the expensive quest) to get my hands on the oddball chemistry needed couldn't be justified for the sake of these five rolls of film which might not work out in any case.

What's a guy to do? Improvise! Among the posts in that APUG thread I found was one that listed the recipes to make every step of the C22 process from raw chemistry. The active ingredient for the bleach step appeared to be just Potassium Ferricyanide which I keep around because of its uses in black and white print making. Having most of the other ingredients as well I matched the formula as well as I could to produce half a litre of experimental C22ish bleach.

Bleach is just one step in the colour process though, and it was only through luck that I had materials on hand to create a reasonable facsimile of the one chemical bath. For the rest of the process I'd have to wing it. Stitching together various other nuggets of advice either found through web searches or offered up in discussion forums in response to my own queries I put together the following plan based on a working temperature of 20oC
  1. Water pre-soak: 1 min
  2. Unicolor C41 developer: 20 min
  3. Stop bath (standard film dilution ): 2 min
  4. Water rinse: 2 changes w/ 30 sec agitation each
  5. C22ish bleach: 7 min
  6. EcoPro Clearfix (1:4): 6 min
Followed by the standard wash I would give to any black and white film. There's nothing special about the choice of fixer, this is just what I use for black and white processes. The only real departure from this plan was necessitated a discovery made when loading the film onto the reel for the daylight developing tank. Over the decades it seems the backing paper had begun to adhere to the back of the film. I suppose I could have dealt with this afterwards but if nothing else I didn't want little bits of black paper floating around the chemistry baths, most of which would be re-used. The pre-soak stage was increased from 1 minute to about 200 minutes with several changes of water supplemented with sessions in full darkness of rubbing little bits of damp paper off the surface of the film. The effort was largely, if not totally, successful.

As I pulled the film back off the reel following all of this it wasn't clear if my efforts had been in vain. Of course there was base fog like nobody's business with plenty of mottling and density variations, but while I could see that there was actual image hiding in there it wasn't clear if it would be usable. Not surprisingly my first attempts to scan them didn't look like much, revealing far more mottling than image, but I managed to find a trick. The messiness was confined to the red and green layers of the scans, but the blue layer was just the opposite, revealing just enough mottling to make it interesting. I wound up making two scans of each image, one a monochrome image weighted almost entirely to the blue channel, and a second scan made just for colour balance. I then pasted the first scan as a luminosity layer over the second colour scan. The results are what you see here.


As you can readily see, especially in the third image, my efforts to remove the adhered backing paper were not entirely successful. Another good soak might just clear away what remains, but I'm still unsure whether this is advisable or even desirable. I bought this film with a mind to achieving some interesting and unusual results and in my estimation at least it was a success. The only question now is whether to stick with what worked reasonably the first time or experiment to see if I can get something even more satisfactory. I metered for an ISO of 8 for most of the roll, going down further, maybe to 4 ISO, seems advisable. Perhaps a bit more time in the developer or perhaps mimicking the original process even further a short soak in a standard black and white developer before moving on to the colour developer might yield negatives that at the very least won't be as hard to work with. I've got some room to experiment at any rate. The Ukrainian seller had one more lot of 5 rolls left and I just claimed it. 

Saturday 28 May 2016

Shooting below the belt.


For most people it seems photography is something that takes place at eye level. It's almost an ideal - the camera as an extension of the eye. So it is that the vast majority of cameras made over the last several decades have been designed to use by being held up to the eye. In this way photographers can expect to photograph the world the way they naturally experience. The thing is, sometimes the whole point of photography is to see the world in new ways, to find in the world of familiar experience aspects of the unfamiliar. While cameras designed to mirror the way we look at the world everyday may be the norm, it doesn't have to be that way, which is probably why I, like so many other photographers, have become a fan of the waist level finder.

These days cameras with a waist level finder, or WLF, are an uncommon enough phenomenon that I should probably take a moment and make sure everyone is clear on what I'm talking about. In the most general terms if a photographer has to look down at the top of the camera to frame up the image this is called waist level viewing. camera is designed such that the photographer frames up the scene by looking down at the camera to view the image this would be a waist level finder. In the years after George Eastman brought photography to the masses waist level viewing was common in the cameras of the day by virtue of mirrored viewfinders such as you will find in nearly any old box camera. These offered a handy reference for roughly what would appear in the image but the straight-through viewing of a view camera or a rangefinder were employed when some aid to focusing was required. The waist level viewfinder photographers from the mid 20th Century on came to know are the natural result of the introduction of reflex cameras, twin lens reflex (TLR) and single lens reflex (SLR). In a reflex camera the image from the lens is redirected by a mirror to a focusing screen at the top of the camera. A TLR uses a separate lens matched to the primary taking lens, while an SLR mirror redirects the image from the taking lens for focusing then flips out of the way during the exposure. A waist level finder is simply an aid to viewing the image on the reflex focus screen directly by providing a shade for the screen that normally collapses out of the way when not in use, and which will often incorporate a flip up magnifier to aid with critical focus.


But while waist level finders are a mainstay of TLRs, they are rare in 35mm SLRs and to my knowledge unheard of in DSLRs (which after all, are just SLRs that happen to have digital sensors). Instead, a special five sided prism, a pentaprism, is employed, redirecting the image to the back of the camera, correcting as it does the mirror reversed image that occurs when a reflex focus screen is viewed directly. Since this viewing arrangement using a pentaprism allows the photographer to bring the camera to their eye, effectively looking right through it from the back, these are often referred to as eye-level finders. Whatever you call them they are a built in feature on the vast majority of 35mm SLR cameras, meaning that despite their reflex design this class of camera adopts a straight through, "extension of the eye" viewing style more natural to other camera designs such as rangefinders.

But while waist level finders are a rarity in the 35mm SLR world, this is not so when it comes to my usual weapon of choice, the medium format SLR. Once the mainstay of professional wedding and portrait photographers these cameras typically feature a more modular design that usually includes an interchangeable viewfinder system, While photographers could opt for a more expensive, and therefore often considered premium eye-level finder, this did not automatically make them everyone's first choice. For a variety of reasons waist level finders are a much more practical option with medium format cameras than is the case with 35mm. To begin with the focus screen is physically larger, matching the negative size, which makes direct viewing much more comfortable. A definite weakness of the WLF is that they are rather awkward when the camera is turned sideways for vertical shooting, but many medium format cameras are either designed for square formats where there is no vertical, or feature rotating film magazines that allowed a switch between vertical and horizontal shooting without the need to rotate the entire camera. Thus while some saw the more economical waist level viewers as an entry level option many photographers stuck with them throughout their careers despite having the option to easily upgrade.

Vivian Maier and her Rolleiflex. The kids today could
learn a thing or two about taking selfies.
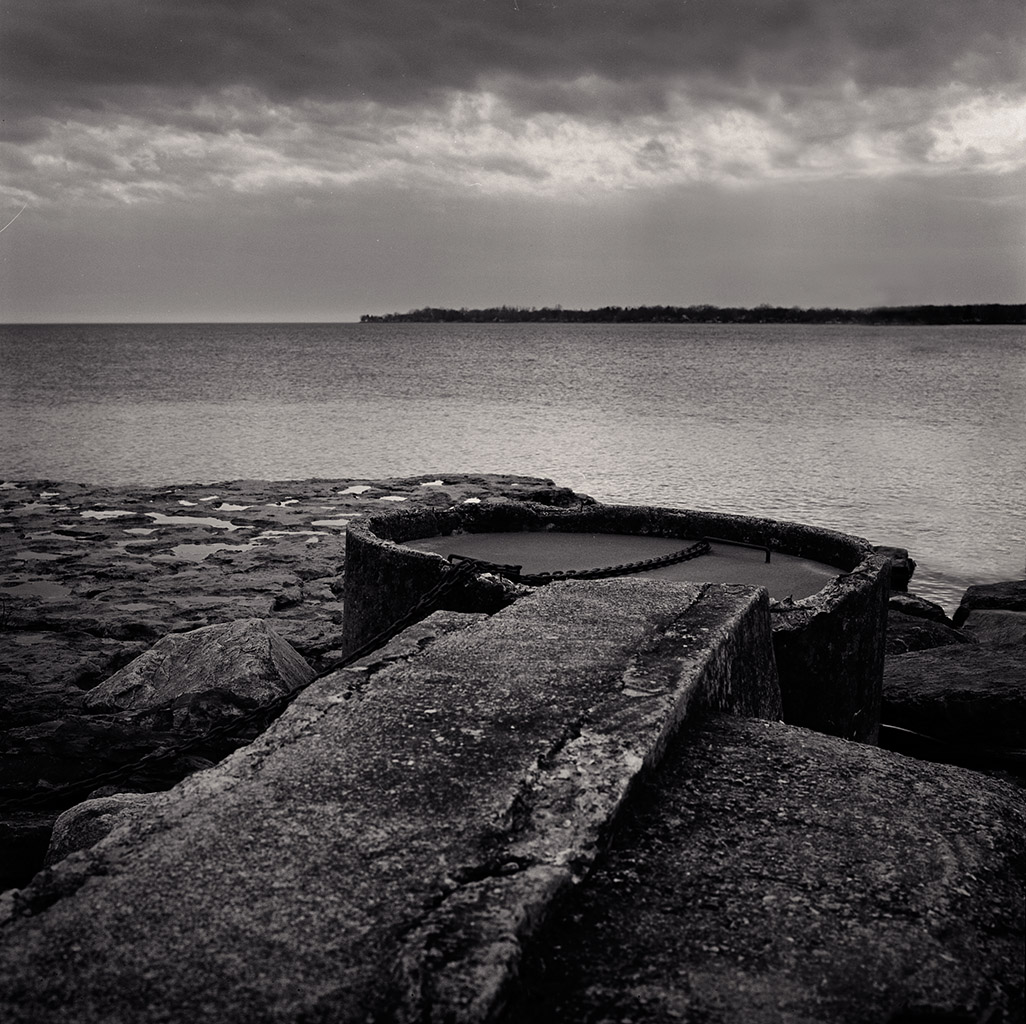
There are a few reasons commonly sited for this. In discussions of the work of Vivian Maier for example it's frequently conjectured that her work benefited from the fact that  that the waist level finder of her Rolleiflex camera made it less obvious to her subjects that they were being photographed since she was looking down at her camera, diminishing the sense that they were being observed. That's all well and good for a street photographer but given my bent for landscape subjects it's hardly a reason for me to be a WLF fan. In simplest terms for me it comes down to the way this kind of viewfinder simplifies and encourages the use of lower camera angles, everything from chest level all the way down to the very ground itself.


From our usual eye level vantage point of perhaps 1½ to 2 metres our attention is most easily drawn to things at a similar height, most especially other people which is fair enough, but it does make it easy to overlook what's going on closer to the ground. There's a lot of interesting things to be found near the ground, almost (so the joke goes) as if they were drawn there by some mysterious force; rocks, seashells, sun bleached antelope skulls, creepy old dolls, forgotten and discarded, once loved by a little girl now in her mid thirties. And yes, we could photograph all of these things by standing over them an shooting down as they lay at our feet, but I hardly think I need to explain why this approach is so unlikely to lead to anything that is interesting photographically. It's just a patch of ground with something laying on it.

Get down closer to the level of that whatever it is though and everything changes. There is context, meaning, story. That seashell stands alone against the expanse of sand water and sky from whence it came, the unfortunate antelope amongst the scraggly vegetation struggling up from the cracked dry earth,  a victim of its harsh surroundings. That creepy doll that somehow found its way to the base of a knotted old tree in the sinister gloom of a misted wood where.. my god, did I just see it move?

You could of course photograph all of these things using a camera that has some sort of straight through camera. For the lucky there will always be a spot of dry ground to shoot from, and for the intrepid one can simply endure going belly down into the wet, the muck, the unidentified vegetation that to the best of recollection isn't exactly what poison ivy is supposed to look like and that bit of a mound that, if it's home to fire ants, you'll know soon enough. But even granting such acts of machismo might be your thing that eye level finder is hardly drawing your attention groundward, inviting you to explore the world from a new point of view and encouraging you to explore the visual world from this new perspective. For that, there's the waist level finder.

Of course my weapon of choice is the traditional medium format SLR where this style of viewfinder really shines. There are WLF alternatives for some 35mm SLRs. For vintage aficionados they were sometimes standard in early SLRs of the 1940's and 50's, but if you're after something more recent all but the most current members of Nikon's F series have interchangeable viewfinders and while uncommon there are WLFs for these cameras out there. Alternatively however a right angle finder that fits over the eyepiece of the prism viewfinder is available for a greater variety of 35mm cameras giving many of the same benefits while rotating versions eliminates the limitation of horizontal only shooting. These of course can also be the ticket if you shoot with a DSLR, though you can bet that if I were a digital shooter I'd chose a camera with one of those nifty articulated live view screens.

Admittedly there are times when waist level finders are not the ideal thing. They are good up to about chest level but no higher, and sometimes either to get the needed perspective of just to shoot over a fence this is a severe limitation. Once or twice in a pinch I have turned the camera sideways, standing at a right angle to the subject, just to be able to use it at eye level. For my Mamiya and Hasselblad systems however I have prism finders that can be swapped in for the waist level versions. These might actually get used, if I'm being generous, about 5% of the time and if I leave them in place after using them I inevitably replace them with the usual waist level finder in the next shooting situation because the eye level view just isn't working for me.

The 'Blad with waist level finder attached, optional prism finder to the right is ready when needed.

There are times when 35mm would do just fine but I still bring the medium format gear not because the bigger negative is suddenly important to me, but because I know the eye level finders I have on all my Nikons will almost certainly bring me to a choice between belly crawling on some questionable terrain or not getting the shot I want. And while I'm fully kitted out for 4x5 I'll still nearly always go for the medium format gear bag on the way out no so much to avoid the extra heft (though there's that) or the extra expense (thought there's that) but because, again, there's that straight through viewing. There are things on my photographic horizon (to be discussed in future episodes I'm sure) that have me thinking hard about shooting those big negatives more often. There are right angle viewers available for 4x5 cameras... It seems the wish list never quite ends.


Tuesday 3 May 2016

Pinhole Day 2016

It's a darn good thing somebody goes to the trouble of organizing the annual Worldwide Pinhole Photography Day. I wrote about the tribulations I experienced during the 2015 WPPD while I was still shaking out some of the bugs involved in using the 8x10 pinhole camera I had built the previous autumn, the details of which you can also find back in the September 2014 archives of this blog. Consisting of a box with a teeny hole at one end, the camera itself wasn't the real issue so much as the here were no real issues with the camera itself on that day so much as dealing with the resulting exposures, namely the contrasty, highly scratch-prone x-ray sheet film employed. I was trying something new so it was the usual case of learning a few lessons and making a few adjustments. The trouble is that with everything else going on in my photographic life I didn't get around to trying out those new adjustments until WPPD 2016 came along and lit a fire under it.

My choice for entry in the WPPD 2016 on line gallery - image #1234 as it happens.

Worldwide Pinhole Photography Day itself is an event simply to celebrate photography in arguably its simplest form and to raise awareness of the power and expressive potential of photography done with traditional materials and tools. It's also a great educational opportunity. Grade school children can build pinhole cameras from materials as simple as a shoe box, baking foil and a bit of tape, load it up with a sheet of photographic paper then after making an exposure develop the image using a simple darkroom setup, all in the course of an afternoon. It's science and art all rolled into one. For me though it's simply a reminder that pinhole photography is something I have in my photographic repertoire, or it's supposed to be anyway. I shouldn't need the reminder, but there it is.

While WPPD falls on the last Sunday of every April my day job allows little consideration for weekends, so as had been the case with the previous two WPPD's I participated in I did not have the full day to work with. Just as well perhaps as with two 8x10 film holders to my name I was limited to making four exposures. I had a few locations in mind that weren't too far from where I work so it was a cinch to get it all done on the way home.


Making the exposures was the easy part though. I still had to deal with getting those large finicky x-ray negatives developed. I wrote about my results from last year in Pinhole Day Misadventures so I won't reiterate the issues I ran into here.  This year however I had the hangers and tanks at my disposal so I wasn't expecting negative scratches to be an issue and as it turns it wasn't. My second concern was the excessive contrast I have been getting from x-ray film with standard film developers. Though it can be developed by inspection under red darkroom lighting, the Xtol I used last year resulted in empty shadows despite developing until the highlights were as dense as I dared. My current standard, PMK Pyro, is a compensating developer and would probably give much better results. The 8x10 tanks however require a full 5 litres of solution, and while I probably had enough on hand to mix that much it would have left me short in short supply for other purposes. Having raw ingredients on hand I did a bit of research and decided on a particular Caffenol formula called Delta Micro. Formulated for low speed, high resolution micro films which have similar contrast requirements it seemed right for the job, and what do you know, it actually worked as well as I'd hoped.

Developing by inspection again I found that, unlike the Xtol which brought up a clearly visible image in about 15 seconds, it was several minutes in the Delta Micro before I could see anything happening at all on the film resulting in just a little bit of panic, holding the dripping film hanger up to the safelight to satisfy myself I saw some sort of image forming. Though I didn't time anything it seemed about 10 minutes until they appeared ready to move on to the stop bath. The negatives looked good, displaying a nice range of tones similar to those I expect from standard negatives. The only trouble I , could see were some areas, mostly towards the middle of the image, where they seemed to suffer from a sort of hazy fog. Maybe this was the result of having x-ray film, with its notoriously short shelf life, sitting in film holders for the better part of a year, or maybe it was all that close examination holding the developing negatives up to the safelight. Future experimenting will be needed to sort that one out.


It wasn't horrible but the negatives were denser and lower in contrast in these areas, creating a challenge in the darkroom, especially since I was contact printing which made it a little harder to judge exactly where to burn. For the most part they contact printed well on Ilford MG-IV RC with a #3 contrast filter which was replaced with a #5 filter when burning in those denser areas. The results were okay-ish, but I gave in and did a bit of extra work on the image of the railway tracks in Photoshop after scanning in the contact prints to help even things out a little more. There is still a little of the effect visible in the image below of the graffitied overpass pillars as it occurred to me the fogged area just happened to fall on exactly the right area of the image to resemble a slight mist, though no such mist was actually present.


Each participant can submit only one image each year to the WPPD online gallery. It's not a competition, there are no prizes, images are not judged or ranked in any way and there are not sort of minimum standards to be met other than that images must have been taken on the day of the event with a lensless camera of some sort. I would have been happy with either of the images here, but the perspective and foreground details made the railway bridge shot an easy choice. I filled out the online submission form and uploaded the image. In 2014, the first year I entered, my image came up as #888, and I was pleased it was something so easy to remember. This year I have image #1234. If I'm going to be lucky like that, why can't it be the lottery. (Answer: Because I don't play.)

There may be a few kinks left to iron out but with these results I can see the potential for achieving a unique look that is desireable and can't be matched using standard lenses. Yes I have plenty of other pots on the go, so to speak which I'll no doubt be writing about with equal enthusiasm in the weeks and months to come. Still, there's no shortage of things I hope to do and explore with pinholes, and there's still plenty of x-ray film in the freezer. Hopefully it won't take WPPD 2017 to get me out with it again.


Sunday 24 April 2016

Troika!

We go through life trading youth for experience. It's not a fair trade mind you, but as we've no choice about making it we can only make the best of what we get in exchange. At the cost of a metabolism that allowed me to feast at any opportunity without a care in the world I have at least managed to acquire a greater appreciation for the way in  which things that are better in theory turn out to be otherwise out there in the real world. And while this could be a fitting introduction to any number of topics, today it is about lenses. Specifically it is about the philosophy and practice of building a system of lenses that offers best service within reasonable budget constraints, whatever "reasonable" might mean for any particular budget.

Back when (and it was all about 35mm in those days) I had the notion that at the heart of any lens collection should be a couple of zoom lenses covering every focal length from 28mm (or 24 would be even better) up to 200mm (or 300mm would be even better, with no gaps at any focal length. From there special purpose lenses could be added. Maybe wider wide angles for landscapes or architecture, longer faster lenses for wildlife or sports, and a macro for bugs and the like. Back then I still imagined doing all those things and nearly every imaginable form of studio photography as well. Life has taught me a few things since then, one of which is that specializing in everything is a non sequitur. There were other lessons too, many involving the differences between what sounds like a good idea and what really works. It is here that my notions about the importance of having a continuum of focal lengths got set to the side. Find me on any given day out on a photo walkabout and chances are that, whichever camera system I chose for that outing, I'm carrying three lenses, three single focal length lenses that experience has taught me will almost never leave me wishing I'd packed some other optic. They are my big three, my troika.

Before I get to the nitty gritty of what that means though it's worth taking a step back to see how I went from there to here. There in this case is a time when it would concern me a little if, say I were carrying a 28-70mm zoom and an 80-200mm, that there would be that shot that demanded 75mm's. Not a big deal mind you, but I was careful to plan my lens collection to avoid such gaps. These were the days when the core of my camera menagerie was built around 35mm equipment. At times I owned medium and large format equipment but 35mm remained king for various reasons, one of which was the perceived limitations of the larger kit owing to the fact that I only ever had one or two focal lengths to chose from. Zoom lenses are not that common in the medium format world, and unless there is some optical oddity I'm unaware of, non-existent for large format. It's not that the big cameras didn't get used, just not often enough for me to notice how little difference the lack of an extensive selection of lenses really made.

35mm Troika: 28mm, 50mm and 85mm Nikkors. On any given day I might swap
out the faster 85mm lens for the close focus versatility of my 105mm Micro.

Enlightenment would have to wait for the dawn of what was to become my post digital era when the drastic drop in the price of used professional film equipment made it worthwhile to delay the next DSLR upgrade (still hasn't happened) in order to pick up a Mamiya RB67 to play with. The rest as they say is history so far as my transition back to film is concerned, but the point is that for the first few months when I was pretty much shooting with nothing but the RB I was shooting with just the 127mm lens it had when I bought it. In terms of 35mm equivalent focal length that translates to about 63mm, which seems just a bit to long to be thought of as a normal lens and a bit too short to be considered "telephoto"1. Suffice it to say that if I had to choose one and only one focal length to use this wouldn't be it. Enamoured as I was by that marvellous beast of a camera I went on shooting anyway and found almost to my amazement that it didn't seem to matter. At times it almost seemed as though the things I wanted to shoot almost magically arranged themselves to be exactly suited to being photographed by that lens. Is there maybe something special about that not quite normal, not quite tele focal length? Apparently not because some time later when I acquired a 65mm lens (32mm equiv.) I found I had the same experience if I used that lens and kept the 127 in the bag most of the time. That need to have a range of focal lengths at my disposal was largely illusory.

Largely. With landscape subjects dominating my work I still found myself craving a wider perspective and the 65mm wasn't quite cutting it. On the other end there were also times when I wished for the reach and more importantly perhaps the compressed perspective of a longer lens. A 50mm (25mm equiv) for the Mamiya quickly became a favourite, I also picked up a 250mm to cover me when something longer is needed. Arguably it's a bit too long but I'm not sure this has ever mattered and considering it was less that $100 with the shipping I can hardly complain. True it's the least often used lens of the bunch, but when I need it, I need it.

It was thus that I completed my first troika, three lenses - wide normal and tele - that keep me covered for nearly everything I consider worthwhile committing to film. Not always, it's true. There are times when something longer, wider or with some other special capability were at hand, but every new piece of kit comes at a premium in terms of space in the gear bag and wear and tear on the vertebrae. Let's also keep in mind that while this combination is what works for me and the way I shoot these days this isn't intended as a general recommendation. Everyone shoots their own way. At the same time what I shoot isn't that unusual in terms of subject matter, and my optical troika could serve equally well were I to branch out into any number of other areas such as portraiture or street photography.

Medium Format Troika: Starting from the left we have a 150mm portrait length tele, 80mm normal mounted
 to the camera and a 50mm wide. This is about perfect for 6x6 square though equivalent focal lengths may vary for
other negative sizes, a little shorter for 6x4.5 for example, and somewhat longer if your camera yields 6x9 negs.
If I could boil the change in the way I approach lens selection down to its essence I think it's best stated thus: while once I imagined that there was some ideal focal length that allowed an image to be framed and composed just so, now it's just a matter of perspective. Literally. In my experience it's enough to note whether making a particular shot look the way I want it to requires the exaggerated perspective of a wide angle, the compression of a longer lens or a neutral normal. Once the need has been matched to the corresponding member of my lens trio the rest is just a matter of framing it all up in the viewfinder. That's oversimplified a little. Strictly speaking perspective is about the relationship between the apparent size of near versus far away objects which is a function of camera to subject distance and the right lens is the one that lets us fit everything in, which is a topic for another day. Out there in the field (or beach or sidewalk...) I don't choose the perspective by selecting a lens, I do it by eye, determining roughly where I need to stand in order to have all the elements in their right proportion and position relative to each other before even taking the camera out of the pack. In doing so I've already chosen the perspective. I'll then attach the lens I think is going to get it all framed up nicely and, truth be told, sometimes I'm wrong about which lens that is. The only really important part is that it's almost always one of the three.

Large Format Troika Starting from the left is the massive 240mm Symmar-S which, at just over 70mm
 in terms of a 35mm equivalent focal length is shortish for the long member of the troika, but less taxing
in terms of bellows draw on the 4x5. Mounted is the very nice 150mm Symmar-S with a 90mm Fujinon
rounding things out on the wide end.

Leaving aside those reasonably rare occasions when I wish I had a lens wider or longer than anything I am carrying, you may be wondering how it is if I pick my spot as I just described, then pull out the camera, how is it that the lens that is just right will always turn out to be one of those three. Or maybe you're not wondering that, I don't know. Thing is it's something I would have worried over in the past. I'd long heard photographers who were as fond of prime lenses as I have since become use the phrase "zoom with your feet". It always struck me as a terrible notion was irredeemably flawed in that it would only work if where you needed to stand to get the subject just so in the frame and where you needed to stand to get the perspective relationships just right happened to be the same spot. The experience of using fixed focal length lenses has taught me that there aren't any such spots any more than there is one and only one valid choice with respect to any of the other myriad decisions a photographer must make. A photograph that might frame up just so with a zoom lens set to 74mm might be slightly different than one framed up equally just so with an 80mm from half a metre further back, but the odds that either one image will contain some elemental brilliance that the other lacks is next to nought.

The take away here isn't that you should ditch your zoom lenses or that that longer telephoto lens you picked up should be relegated to shelf queen status. If you're a zoom lens user you may have been muttering to yourself something along the lines of "but my 28-85 is this whole troika business in one lens!" to which I say fantastic, hope I've given you little a better appreciation of how much can be accomplished within that midling focal length range, now go blow off some film with it. (Or fill up one of those little memory card thingys if that's what floats your boat.) If you're a fan of super wides or maybe longer focal lengths who could blame you. Without a doubt they are part of what gives your work that particular character that makes it yours. If on the other hand you find yourself lustily flipping your way through catalogues of the prestige glass, imagining the experience of cradling high end extreme optics in your hands as you eye blue and magenta glint of the high tech multicoating laid onto a flawless curve wrought into the surface of a piece of exotic optical glass with sub micro-metre precision then I'd suggest a moment's pause to consider whether it just might be the case that some notion of the ideal optical system (with maybe just a hint of avarice tossed in for good measure) has drawn your attention away from what could be accomplished with something much simpler, more common. Don't let the affordability fool you.


1. The photo nerd in me won't allow me simply toss out the term "telephoto" without pointing out that while the word is commonly understood to mean a lens with a focal length in excess of what would be considered the normal range, this usage is sloppy and when it comes down to it incorrect, hence the quotes. When a lens has an optical focal length that is longer than its actual physical length, that's a telephoto. It's generally true that most long lenses have a telephoto design, but not always. The 240mm Symmar-S pictured above for example is not a telephoto. My pedagogical instincts no satiated I'll leave you be. Sorry folks, it's a character flaw I know but I'm working on it.

Saturday 9 April 2016

The Lake Is A Lie


Here's a lovely little image taken from a rocky beach along the shore of Lake Erie that I had such high hopes for. It had been a bland day up to shortly before this image was taken, the textureless overcast of morning having gradually given way to a cloudless blue above without even that brief transitional play of cloud and light to provide visual interest to anything above the horizon line. It was only by virtue of a long standing inability to learn when to give up that I was still out there at all when a lucky cloud bank rolled in, providing about a half hour or so the conditions I'd been wanting for all day. In that time I fired off the remaining half of the roll I had been working with all day to that point and made a fair start on another. The entire day of wandering aimlessly with a camera had been worth it after all.

Or so I had every reason to believe up until the moment, later that evening, when I pulled the roll off the developing reel in order to hang it to dry. It was only then that I learned the sad truth, a truth that means, lovely as this image may seem at first glance, it will never see the light of... well, an enlarger lamp. Things are not as they appear here.

You see friends, the lake is a lie. What you see is the result of a not particularly meticulous Photoshop rescue of a painfully ruined image, unrescuable by standard analog means. Worse, it is the result of problem that affected exactly those images that were taken during that half hour I thought had been the day's salvation.

Here is the photograph I actually took...


The culprit... a piece of plastic film that formed part of the light trap for the dark slide slot of the film magazine. I would assume that on inserting the dark slide I had pushed it loose so that it jutted into the image area, where it appeared on all subsequent exposures until I discovered the problem. Not wanting this to be a total loss I spent about a half hour fooling around with the rubber stamp tool, magic healing brush and the like until I convinced myself I had something passable enough for the casual once over the image would get when posted online. Knowing the truth of the matter though I don't imagine you'll have much trouble spotting the flaws. I haven't had the heart to tackle several other hoped for masterpieces that were similarly ruined.

Once the problem was known I was able to take the film magazine into the darkroom and by feel find and extract the offending piece of plastic without even having to sacrifice the remaining exposures on the film which all came out fine (though honestly I just blew off the rest of the remaining frames on some so so images for fear that, if there were light leaks, I'd care about the images that were wrecked). Despite the damage the light trap has never the less performed adequately since with no hint of darkening along the edge of the two rolls that have gone through since. I was fortunate that a quick search turned up a fellow who sells complete light trap kits online, not just the foam but the little Mylar bit that came loose in my case. It arrived the other day but will have to wait until the next roll is through to be installed. If I hadn't found that neat solution I also found a DIY alternative suggested in a few online forums involving cutting a substitute plastic film literally out of film using the exposed and developed leader end from a 35mm roll, the part that usually gets cut off and tossed once the film is dry. It's a good idea to file away for the future - there's no guarantee ordering one will be so simple next time I need to redo the light trap. 

Arguably if I spent more time on this I could get a nearly flawless image, indistinguishable for all intents and purposes from what I would have come away with if that little piece of plastic hadn't come loose in the first place. I've spent far less time on this, after all, than I would normally invest making a decent darkroom print from a good negative. In theory a digital negative could then be made and contact printed in the darkroom yielding a traditional silver print. Don't look for it to happen though. It's not that I'm some some sort of purist, I have no principled objections. I just don't see myself ever having the motivation. There's plenty of other good images I could be printing. Why fake the lake?

The good news? That concrete drain looks like it's been there for a while. It will probably be there just the same when I go back, film magazine intact this time.

Thursday 31 March 2016

A winter of... meh

Taken with the Bronica S2a with a 75mm Nikkor-P lens with an orange contrast filter on Ilford HP5 Plus.
Last year I wrote at length of my photographic revelry during the winter of 2015, a year in which Lake Erie came very near to freezing over completely. I noted how winter, at least at my latitude, can transform a landscape that was feeling a bit photographed out into something altogether fresh, and how I was therefore looking forward to what the winter of 2016 would bring. Well, it looks like for the most part El Niño put the kibosh on that idea as Winter really only put in a few token appearances this year. 

I was perhaps being a bit too optimistic in my hopes that this year would be anything like last. El Niño aside the consistently frigid temperatures of the previous year certainly seem to have become more the exception than the rule these days. But although the ground remained conspicuously un-snow-covered much of the time, there were still those token appearances, temperature drops lasting the better part of a week that, while they were too brief to produce the grand ice desert landscapes of the previous year, did bring about a few situations that wouldn't occur at any other time of year.

Case in point is the image up top. The glazed structure in question is part of concrete remains of the long abandoned Erie Beach Amusement Park that is my default destination when I'm not up for a drive out of town and don't have any better ideas. The doorway here leads into a sort of concrete room of sorts that served who knows what purpose back in its day, which is at one corner of a sort of sea wall that encloses about a hectare now overgrown with trees and cat-tails for, again, who knows what purpose. On brighter days it's possible to see to the bottom of this "room" to a floor of rocks and broken concrete, along with the occasional beverage containers and other artifacts suggesting periodic exploration by those presumably much younger than I. Photographically it's always been a bit of a challenge to me in that it seems like something that should be more interesting than any of the images of it I've come away with.

On this day however the combination of strong winds and a particularly brutal (at least in context of this winter in general) snap of cold had transformed its gratified concrete walls into something other-worldly.  In a colder year in fact it's something that wouldn't have happened at all as it wouldn't have been possible for the wind to spray the surface with water, which then froze, had the surface of the lake been frozen over. Those wild conditions had happened the night before. Things were nice and calm the next day when I got there, a few somewhat eerie clouds having moved in to compliment the mood. As you can no doubt guess rendering them as such required no small amount of burning in, accomplished here via Photoshop as the darkroom has become temporary storage through the winter while work has been going on elsewhere in the house. I'm guessing this is something a lot of home darkroom practitioners out there would relate to.


If the story of cold combined with strong winds on Lake Erie coating things with ice this passed winter sounds familiar it may be due to an image that widely circulating around the internet last January depicting a car frozen in place and completely covered over in a layer of ice. This happened in Buffalo NY, just across the way from me and, surprise, was the result of the same set of circumstances that gave that car its frosty coating. I somehow doubt that my image will make its way around the internet to the same extent. It's a shame too because, while I'm admittedly biased, I think mine is the better photograph.