Saturday 23 May 2015

Taming the Dragon

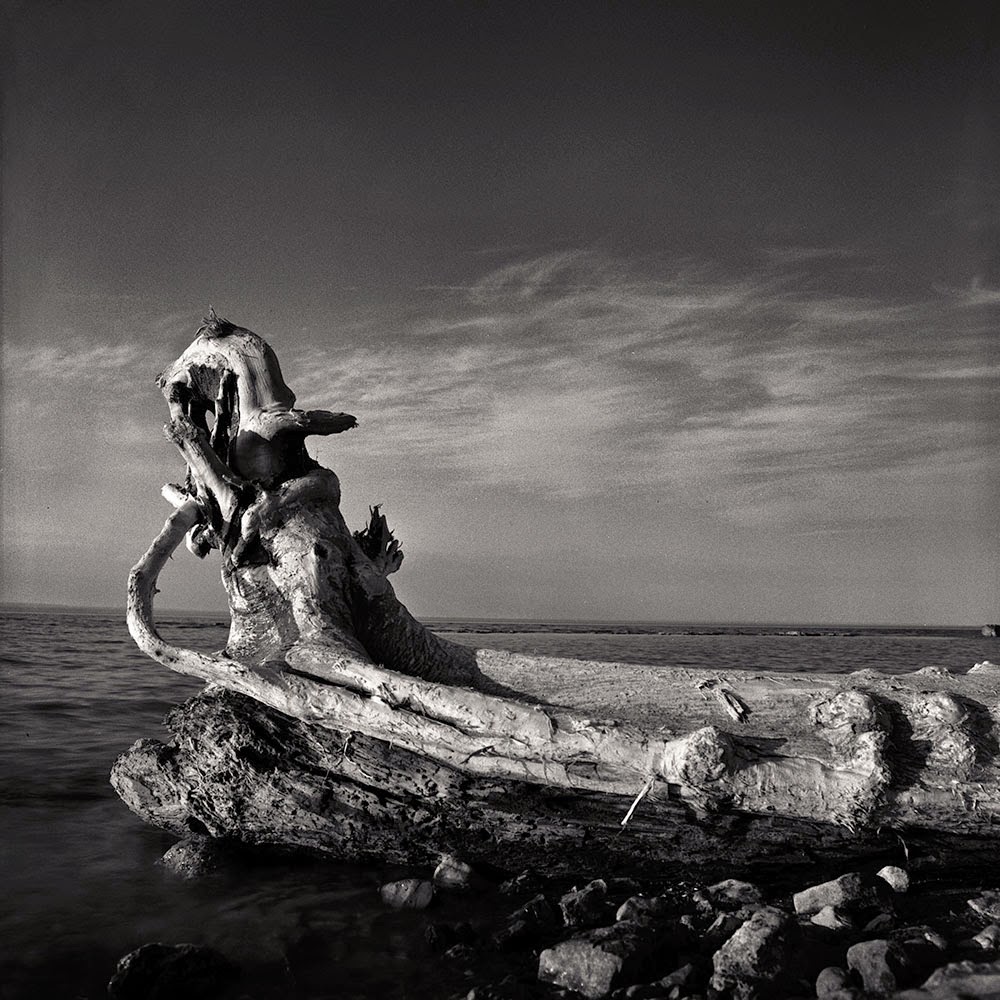
Is that dark speck out in the water another pinhole in the negative? Thankfully no, close inspection reveals it is just a duck.

This is a progress report of sorts on the situation I described a couple of episodes back in "Curse of the Dragon". That title refers to one subject, a driftwood log that reminded me of the dragon figurehead on a Norse longboat, of which nearly every image I took seemed to result in a negative plagued to some degree or other by pinholes in the negative, resulting in dark spots on the positive image. It wasn't the subject of course, just a bit of bad luck that somehow on three separate rolls of film that contained images of that log nearly all the spots wound up on those negatives.

Now if the only thing I was ever going to do with these negatives was scan them and put them up on the internet, or even if I printed from scanned files, this would be little more than an annoyance. These black spots are no more difficult to remove in Photoshop than are dust spots, the near inevitability of which I've reconciled with long ago. For me however a finished image is nothing short of a traditional silver print. With Photoshop taken out of the equation retouching dust spots is done on the prints directly using special retouch dyes and a #000 brush. This of course can only make a light spot darker and there is some risk of ruining the print, especially if you're out of practice. Retouching the dark spots that result from pinholes in the negative requires much more drastic measures and a much greater risk of botching the job. After spending hours getting all the printing details down, toning, archival washing and so on (retouching has to come after all of this) the risk of that kind of heartbreak is something I consider unacceptable. Finding solution to this out of the blue problem is therefore a necessity.

A quick review or those of you who haven't read the first part, pinholes in photographic negatives can be caused either by air-bells, which are simply tiny bubbles of air that cling to the surface of the film preventing developer from reaching the emulsion at that spot, or chemical reactions suddenly releasing little gas bubbles that blow tiny holes in the emulsion. Think of the fizz you get when you mix baking soda and vinegar. Developers contain an alkali very similar to baking soda (I start with baking soda to make the alkali for my home mixed developers) and the acetic acid in most stop baths essentially is vinegar. It seems pretty safe to eliminate cause number two though - I use plain water in between developer and fix.

So air-bells are almost certainly the culprit, but what is behind their sudden appearance in such numbers? To be sure the occasional stray pinhole has found its way onto my negatives from time to time, but never before has an image looked like it had been sprayed with a tommy-gun. My standard practice when developing roll film includes two preventative measures - pre-soaking the film in plain water before starting with the developer and giving the tank several firm raps on the counter after every agitation cycle to shake off any bubbles that form. Many darkroom workers suggest a single rap only after the developer is added and say they find a pre-soak to be a waste of time so I always thought that if anything I was being overly cautious. To be suffering from them anyway just seems unjust.

Something In The Water?

I had two suspects in mind. The first was a possible change in the water. Part of the reason I always seem able to find new images along the same few kilometres of beach is the fact the lake is an ever changing mistress. Well that same changing lake that figures in so many of my images also happens to be the source of the water those images are developed in. It never seemed to be a problem. The water quality where I live is pretty good, we don't have hard water and our town water was rated the second best tasting water in Ontario. But the treatment and testing of tap water is done with a mind to human consumption, not consistent results in the darkroom. Distilled water is considered the gold standard when mixing photo chemistry. In areas where the tap water is less suitable for photo chemistry it is virtually mandatory. Even though I've never considered tap water to be a problem the one virtue distilled water has is that it's not subject to sudden changes and is the same anywhere you go. It isn't expense that's kept me from using but rather the dual inconveniences of having to store it and the fact it doesn't run hot and cold which can make getting it to a specific temperature an extra challenge at times.

Factor number two was the change I had made a month or so before from using the stainless steel tanks and reels that had been my standard for years to plastic Paterson tanks and reels. It seemed like a safe choice - Paterson has to be the most widely used daylight processing tank system by quite a stretch. The comparative advantages of plastic vs. stainless could (and very well might) be the subject of an episode on their own, but my reasons for doing so have less to do with versatility and ease of use than my accidental discovery that a problem with negatives showing more development along the edges of the film compared to the middle simply went away when I used them. For this reason I was hoping the water was the problem. I did not want the solution to the pinhole problem to require a return to uneven development I thought I had banished for good. It wasn't a severe problem, it just required some extra effort during printing to even things out, but it was a pain and sometimes even meant using an extra sheet of paper or two to get things right and I was glad to be rid of it.

My stainless steel tank and 120 reel on the left, and Paterson
tank on the right along with a reel adjusted for 120/220 film.
Why should the tank make any difference at all? The main reason, I believe, is that the reels for the plastic tanks are much more tightly wound. For those of you not familiar with spiral reels for processing film they are simply consist of two circular grooved surfaces separated by the exact width of the film allowing roll to be developed can be wound around the grooves, ensuring no part of the roll is in contact with any other when placed in a cylindrical developing tank. As regular readers are probably aware I primarily shoot 120 film. The stainless steel reels I use are wound just tightly enough to accommodate standard length of 120 film which can be up to 840mm long. One of the great advantages of Paterson reels is that the same reel you load your 120 film into can be adjusted to accommodate a roll of 35mm film up to 36 exposures as well. But a roll of 35mm film is almost twice as long as 120 roll. This means that a 120 roll is wound much more tightly than it would need to be if the reel was designed exclusively for 120 film as is the case with stainless reels. As a consequence there is less space between successive windings of the film surface to allow bubbles to escape. Looking at film in the tank with the lid off while its being washed I have also noticed the flatter tops of the plastic reels seem more apt to keep the bubbles that have risen from below from escaping to the surface.

Well, that was my theory anyway, the one I hoped wasn't the case. Though it seemed reasonable I had a couple of reasons to think it wasn't so, The first was this wasn't the first time I had used these tanks, so why didn't I notice this before. The second was I have seen all kinds of stainless vs. plastic comparisons and had never heard anyone suggest propensity for problems with air-bells was a factor. The proof of the pudding though, would be in the eating.

The Investigations Begin

Chosing to let hope lead I decided to stay with the Paterson tanks for now and see what happens with distilled water. I'm currently working with the Beutler formula as my standard developer, mixing the stock solution from scratch using distilled water. Now I would be diluting it for use with distilled water as well, rather than tap water which had always been my practice before. Just to be safe I also used distilled water for the pre-soak. For the remainder of the process tap water would be used as usual since I had no suspicions the problem might occur after development. Even as I was hanging the strip out to dry the result was obvious however as an unmissable clear spot appeared smack in the middle of a dense are of sky on one of the images. On the bright side it wasn't an image I would have wanted to print anyway and there weren't many pinholes besides this. In the grander scheme of things however this wouldn't do.

Before reverting to the stainless tank however I decided to give one other idea a go - adding a few drops of the wetting agent (Photo Flo, LFN or what have you) to the pre-soak and the developer. Having run into one or two sources that recommend against this I was reluctant to try it, but the more I researched the more I found this was done a matter of course by more people than I had suspected. No matter, it still wasn't difficult to find pinholes.

I actually had to dig the stainless steel tank out, having stored it away thinking I might never have use for it again. It's back in it's old spot now though because from it emerged the first roll of film since the curse of the dragon began that did not contain pinholes. Some extra density along the edges, yes, but those can be dealt with.

Putting It All Together

Did I really have to deal with them though. I had a pretty good idea why negatives were coming out of the plastic tanks more evenly developed. Even when filled with chemistry they weren't really full. There was always a generous amount of air at the top so that when the tank was inverted there was room for things to slosh around, replacing exhausted developer with fresh more completely. With stainless tanks I have always been in the habit of mixing enough chemistry to allow me to see it above the top of the light trap in the lid - 475ml. It was more that the 450ml suggested, but it was somehow reassuring to see it, knowing there was no possibility anything inside wasn't completely immersed in chemistry.

Straight from the scanner this is typical of the results I often
got with negatives developed in stainless steel tanks. Note how
much brighter the sides are compared to the centre.
With a bit of new perspective this now seemed like precisely the wrong thing to do. Before my next roll went in I decided to find out exactly how much chemistry was actually required to cover the reel in the tank. It seemed 400ml would do it and 420ml gave plenty of cushion if, for example, the tank wasn't set down exactly level. It also divides out nicely with the 1+1+12 dilution I've come to favour with my standard developer. Compared to what I had been doing that's 55ml of extra space to allow chemistry to slosh around, mix together and even out during agitation (also 55ml less chemistry used.) Would it make a difference?

It's only been one roll since I tried this but so far the answer is yes. The image at the top is from this roll. It came out as even as anything that's come out of the Paterson tank and pinhole free. It seems like it's the plastic tanks that will be headed to storage now, which is a shame really since it was the more complete system. The stainless system I have limits me to developing one roll at a time which can be quite a pain. I'll be travelling most of this week and anticipate returning with several rolls to process. On the bright side I like working with the stainless tanks. I find the process of loading the reels more foolproof than with the plastic and the tanks I have don't leak at all. For some reason every Paterson tank I have ever used dribbles a little chemistry every time they are inverted.

None of this is to suggest the Paterson or any other plastic reel and tank system are bound to give you the same results. If everyone had the results I got these products would have fallen off the market long ago. It's, what can I say, one of those things. Somewhere in the idiosyncrasies of the materials I use and the way I do things is the reason I had problems while countless others did not. Maybe someday I'll figure out what it is. The real bottom line is that if none of this happened I'd probably still be doing things the way I have for years thinking density variations were something I just had to live with.

Post Script

As I said I'll be travelling much of the upcoming week. The bad news is that leaves me without any significant time for any little extras like writing another blog entry so there will be no Golden Age of Silver next week. The good news is that I anticipate having at least a photo or two taken during my travels to talk about, and if for some reason I don't, well the reasons for that should be worth talking about for their own sake. At any rate, lets all agree to meet back here sometime in early June.

Saturday 16 May 2015

Shoot Like An Amateur...

...advertised no book or photography course ever. Not in the past hundred years anyway. The word amateur has become shorthand for one who dabbles, piddles about and thereby possesses little real skill. Obviously if their skills were up to snuff someone would be willing to pay them for what they do, and they would no longer be an amateur. Thus, no matter what field of endeavour we might be talking about, one of the highest compliments we can pay is to say that someone is a real pro. Conversely it's a dig against someone to call them an amateur, or their work amateurish.

Shot like an amateur. In my life as a professional wedding and portrait
photographer when would I ever have the chance to do something like this? 

Would it come as a surprise then to learn that there was a time when if you wanted to be taken seriously as a photographer being an amateur was considered the ideal? In the 19th century amateur photographers were widely seen as the people who were pushing the new medium forward, driving the technology, promoting it as an expressive medium to be taken seriously, one of the beaux-arts on par with painting and sculpture. The earliest professionals with their crass commercial motives weren't often considered allies in the struggle for recognition.

Noble perhaps, but not entirely fair. In photography's earliest years being a photographer could mean one of two things - either you were a member of the landed gentry and had the money and leisure to take up the expensive, difficult and time consuming discipline that photography was at that time, or you made it your trade. If you were drawn to the magic that was and is photography and weren't born to the privileged classes becoming a professional was your only choice. 

Nelson's Column, an image by photographic pioneer Henry Fox Talbot, grandson of the 2nd Earl of
Ilchester, heir of Lacock Abbey where many of the interior scenes were shot for the Harry Potter movies. 

The situation changed as advances in photography over the following decades saw a continual decline in the level of privilege it required until eventually there was a camera in virtually every middle class home. As the Twentieth Century dawned, taking a serious interest in photography for the love of it no longer required titled ancestry. Photographers like Edward Steichen and Alfred Stieglitz oversaw the transition of the painterly romanticism that characterized the work of the leading photographers of the previous century to the modern approach of photographers such as Paul Strand and Ansel Adams that made no apologies for photography's unique realism. Different though their approach had become, this new breed of photographer could in a sense trace a direct lineage back to the amateur elite of photography's early days. Somewhere along the way however even these leading lights of the idea of photography as art started making a living at it. Even these greats, icons in many ways of photography for the love of it, were by definition professional photographers. At the same time, as cameras came to outnumber electric toasters in households everywhere, nearly everyone had become in at least some sense an amateur photographer. The reversal of status was now complete.

In the heady day following photography's introduction there were those hoping to find in it a way a way to cash in. Once it became established, and ever since, it's been is a love of photography that by and large leads people to take it up as a profession. Anyone who looks at photography as an easy way to make a few bucks is either a scheister or sadly misinformed. At the same time, depending on how far you're willing to stretch definitions, the 344 selfies that constitute my daughter's camera roll might be considered a fairly typical amateur portfolio these days. When the term amateur photographer could mean anybody who takes a picture that isn't a professional, no wonder everybody wants to Shoot Like A Pro.

Here's the thing though, I've been a pro and I'll tell you gladly I'm grateful not to be shooting like that anymore. Not that it was a bad gig, and I even did some work I'm still proud of, but it's not what I got into photography for. I've spoken to any number of working professionals over the years who've admitted they've lost nearly all interest in doing photography outside of work. It's almost always a love of photography and the idea of being able to do it all the time instead of working that leads people to profession in the first place. I sensed myself heading down that same path myself a few years back. It took a while, but it all came back. The problem wasn't that I was tired of photography, it's that I spent too much time shooting like a pro. The only reason I still care enough to sit down and write about it every week is that I set that aside to once again shoot like an amateur.

 Of course I use the term amateur more in its 19th century sense here with all the connotations of passion and dedication that go along with it. I don't mean it entirely the same way though. That tinge of snobbish elitism can be left in the past, as can any notion that being a professional takes any less passion and dedication. Though I'm happy with the role photography now plays in my life I know first hand what life is like on the other side of the aisle and still admire the work of many pros. There are even some working professionals I still envy a little. Not the ones doing up wedding albums, or making the same soggy lump you find in a fast food burger container look like something appetizing or even getting field side access at professional sporting events. They're the ones who manage to make enough publishing books, selling prints and doing workshops to allow them to go on shooting like amateurs. Uncompromisingly skilled, fiercely dedicated, unwaveringly passionate amateurs. 

Saturday 9 May 2015

Curse of the Dragon

Last week I wrote about my misadventures in pinhole photography. In this episode I detail my run-ins with pinholes of a different sort, one that photographers are never happy to see, and the disconcerting circumstances under which they appeared.


I call this image "Driftwood Dragon", not because it reminds me of the actual creature so much as the dragon figurehead on some ancient ship of war. It's the remains of a tree that, who knows, may have been uprooted and set adrift in Lake Superior, ultimately coming to rest along my favourite little stretch of beach, just shy of the Niagara. It's one of many driftwood logs I have encountered along the shore now that the ice that had carried them is finally gone, a few of which, like this one, I found interesting enough to spend a frame or two on. This one, however, got more than its fair share. It's not that I found it all that particularly worthy of photographic attention so much as the sense I wound up getting that my every attempt to photograph it was accompanied by a particular darkroom mini-disaster. It was almost like a curse.

This isn't just a tale of my efforts to take a picture of a log however, so let me back up a little to put the story in its wider context. While most of the home darkroom practicing world chooses to develop roll film in plastic daylight tanks, most notably those made by Paterson, my preference has always been for stainless steel tanks. The relative merits of each are a discussion for another day. Suffice it to say that that's what I was comfortable with. When I got my enlarger last summer however part of the lot that it came with included no less than three of the plastic Paterson tanks along with a host of reels. For the most part these had been sitting on a shelf ever since, though I did find uses for them now and then.

One such occasion came up a few weeks ago. I returned from an outing to put the Bronica I had just picked up through its initial paces with two rolls of HP5+ to develop. This has never been a standard film for me but I wanted bring something a bit faster into my arsenal to make it a bit easier to go tripod free when the situation calls for it. This also seemed like an opportune time to finally try Kodak Xtol, a developer I had been considering for some time and it seemed like a good match for the HP5+. I actually wound up getting eco-pro, an Xtol "clone" that is rumoured to come off the same production line.

I could have used the larger Paterson tank to develop both rolls at once, but as these were test rolls and I was using a new developer I wanted to at least have a peek at few frames on one roll to be sure everything was okay before going ahead with the second. I processed one of the rolls in the stainless tank as usual and a quick look coming out of the fix showed everything looked fine, but not wanting to wait for that roll to be hung to dry before starting on the second I decided to process the next one in the small plastic tank. Once everything was finished and I had a chance to look at the scans however I got a bit of a surprise. While the negatives from the stainless tank showed a pronounced decrease in density towards the centre of the image compared to the edges, those processed in the Paterson tank seemed perfectly even. The problem itself may be fodder for a future episode, but suffice it to say that since then I have switched to using plastic reels and tanks.

Now jump forward a few of weeks to find me spotting our lump of driftwood on the shore early one evening. There's some fairly interesting clouds in the background though the light is a bit flat. Finding I can't get low enough with the tripod I set the camera down on a convenient flat rock, propping it up with a few twigs to get the horizon level, and make a couple exposures, the second and third frames on a roll of Fuji Acros. Finishing the roll before heading home I developed it that evening only to find that both frames were riddled with pinholes, little spots on the negative where the film is clear. This is much more of a concern than dust spots since not only are they permanent, but they come out on prints as black spots that, unlike white dust spots, are nearly impossible to retouch.


Above is a scan showing the worst of the two negatives with the majority of the pinholes circled in red. There are actually more than I have indicated here that are either small enough not to noticed or are relatively hidden in the darker areas of the image. The scan would be a five minute retouch job in Photoshop, but I wouldn't waste the time paper and chemistry to print this in the darkroom. I've had the occasional pinhole in my images before, but nothing like this. I'd done something different this time though. After reading through some forum discussion on the practice of pre-soaking film before starting with the developer, my standard practice for years, I decided to skip this to see if it made a difference. Well, obviously it had I thought, lesson learned.

Two days later I was up at dawn with a few hours to kill before I had to head for work so I tossed the camera bag and tripod in the trunk and headed out for some morning photography, including a re-shoot of my dragon boat log. The light was much better now, so maybe it was a blessing I had problems with the first shots. Even the little twigs I had used to level the camera were still there as I had left them the other day. I set up just as I had the day before and did a couple of exposures, then just for insurance switched film magazines and playing around a bit with exposure and filtration did three exposures on HP5+ before finally switching back to the Acros to make two more exposures from a slightly different angle.

I finished the roll of HP5+ a couple days later on some shots of my daughter and processed it right away. This time there would be no skipping the pre-soak. The result was nine negatives completely free of pinholes or any other nasty defect, but though they weren't as bad three images were still marred by them. Guess which three.

I should take a moment here to discuss some of the causes of pinholes that appear like this on negatives. By far the most common is air bells, little bubbles that cling to the surface of the film, preventing chemistry from reaching the film. The best remedy for this is to rap the tank sharply a few times after the developer is poured in and preferably after each agitation cycle. I'm a bit of a fanatic about this, having once broken a tank in my efforts to ensure any air bells had been thoroughly shaken off, so I don't imagine this sudden issue is the result of any lack of bubble-jarring diligence on my part. A pre-soak also tends to diminish the tendency for air bells to form which may be why the problem was so much worse when I didn't do this. Pinholes can also form as the result of chemical action when the film is taken out of the alkali developer and suddenly introduced to an acid stop bath, but I don't use an acid stop bath for film, preferring a water rinse instead. Finally they can appear as a result of dust or debris lying on the film surface at the time of exposure. There may be other known causes, but I'm not aware of them.

Pinholes in a portion of one of the HP5+ negatives. You probably don't need me to circle them.

So now I needed to start questioning everything. There are some flaws that can be accommodated for or worked around but pinholes aren't one of them if you're hoping to make some top notch prints in the darkroom. The problem was there were so many things to question - a developer I had only just begun to use, processing tanks that were different from the kind I had used for years, even a camera I haven't had all that long. Time to start narrowing down the possibilities.

First up was the developer. When I finished up the roll of Acros with the remaining log photos, rather than using the eco-pro I mixed up a batch of Beutler's, a tried and true formula for me and a favourite for me with fine grained films like Acros. It also occurred to me that all of the problem images were among the first few images on the roll. These would have been on the innermost part of the processing reel, so as a precaution I wound the film onto the reel starting from the other end. The result? Pinholes in three of the four images of the dragon log. The image at the top of this post is the only one out of nine taken of this subject on which no pinholes were evident.

For my next roll it will be back to the stainless steel tank. I do get the impression that the more tightly wound plastic reels of the Paterson tanks tend to trap more tiny air bubbles than the stainless reels. Paterson tanks are by far the most popular type of developing tank out there however, it's hard to imagine they have an inherent flaw like this that nobody's talking about.

There is just one other possibility that comes to mind when I consider this - these problems have appeared on the last three rolls of film, each roll having twelve images for a total of thirty-six frames. Of those thirty six, nine were of this driftwood dragon, eight of which were marred by pinholes. I have had a decent look at the remaining twenty-seven and twenty-six of them don't seem to have any problem at all. Maybe I just need to stay away from this log.

Friday 1 May 2015

Pinhole Day Misadventures

The last Sunday of every April is designated Worldwide Pinhole Photography Day (WPPD). To be frank I have no idea who decided this should be so or how they got the rest of the pinhole world to go along with it, but my hat goes off to them just the same. And what with all the bother I went through last year to build a nice hardwood 8x10 pinhole camera it would seem a crime for me not to participate. What follows then is an accounting of the misadventures that so ensued.


My work schedule doesn't heed traditional notions of what constitutes the weekend so I didn't have the day free as I might have hoped, so while having Pinhole Day on a Sunday may ensure as many people have the day free ad possible, for the second year in a row that hasn't included me. Making the best of the situation I packed the car up before heading out to work so I could make a few exposures on the way home. Of the two 8x10 double dark slide film holders I own I loaded one up with x-ray film, the other with Ilford MG IV paper. This would allow me to photograph two scenes on both materials. I also took along my 4x5 pinhole camera with a few film holders loaded with well expired Ilford Delta 400 in case other opportunities presented themselves, but was to put that 8x10 to use on this of all days.

It hasn't had nearly as much use I anticipated after all, not yet at least. There are a few reasons for this but for the most part they boil down to the fact I still don't have a clean reliable way to develop the delicate x-ray film it was my primary intent to use when I decided to build the camera. (Its construction was chronicled across several posts starting with this one last September.) This is exactly what you think it is, the sheets of film they might use at the hospital to see a fractured bone or find the house key someone swallowed in a not entirely well thought out moment. (Apparently these things happen.) These can be used in place of traditional film in large format cameras to yield results similar to orthochromatic emulsions at a price per sheet that can be 1/10th the cost of standard sheet film or even less. That's the case here in North America at least. I once suggested x-ray film to a UK photographer who said he was looking for a more affordable way to do large format and he must have though I had a screw loose when he saw what a British supplier was asking for the stuff.

Using x-ray film presents certain challenges however, not least of which is how easily the emulsion scratches. Try ordinary ordinary tray development and I swear the stuff seems to scratch itself. I experimented with a few methods to avoid this such as developing in extra large zippered freezer bags, but the gold standard is to use stainless film hangers in vertical tanks. Back in school hangers and tanks were the standard way we developed 4x5 film so the idea wasn't new to me, the problem was getting my hands on the hangers. Though used 4x5 hangers can still be found fairly reasonably on everyone's favourite online auction site (it seems like there's some sort of taboo against just saying eBay, and far be it from me to defy convention), this isn't the case with 8x10 hangers. They are scarce enough to require a bit of effort to find, and knowing many of those looking for 8x10 hangers will a) likely have a higher than average motivation to get their hands on such a hard to find item and b) likely have a higher than average disposable income as 8x10 photography generally isn't easy to do on the cheap, most sellers seem to believe it's worth waiting for a buyer to come along who is willing to pay an unruly asking price.

An example of what can happen when x-ray sheet film is developed in the sort of tray most commonly used for pints.
Standard emulsions, the T-Max's, the Delta's and what have you usually fare just fine in the same circumstances.

I got a bit lucky though. While looking for ideas from photographers who use x-ray film I found one who had a small surplus of 8x10 hangers they were willing to part with for a non-gouging price. (As said individual might not appreciate their name getting out there as a potential supplier of reasonably priced darkroom equipment I'll keep them anonymous, but should they ever chance to read this... huge thanks!) Hangers out of the way however, getting my hands on the tanks turned out to be a bigger issue than I anticipated. Even if I found someone who was giving them away shipping alone would have blown any idea of keeping the project low cost out of the water. After a months long search for something that could be remade or repurposed into workable tanks came up empty I got the notion to build a few from scratch. I'd worked with fiberglass for a few times for telescope making projects, and while the results were often not much to look at, if they make boats from the stuff I should be able to fashion a few functional if hideous chemical tanks. As a bonus the box they were shipped to me in had the exact dimensions to serve as a template.

Unfortunately I embarked on the project over the winter. The resin is supposed to be used at something at least close to room temperature and working with anything that noxious anywhere other than our unheated detached garage with the door open was unthinkable. I probably should have waited to even try but by spring I managed to fashion two horrible looking tanks that never the less fit the film holders perfectly.

These beasties may be hard on the eyes, but æsthetics aren't the concern.

If only they held water. My preliminary test fill revealed countless pinholes in both tanks, and a section of one of them that seemed little better than a tightly woven sieve. Some patching up with more fiberglass helped a bit, at least fixing that sieve problem, but it wasn't until I found a can of Leak Seal that an alternative to starting over seemed at hand. This is a spray on product designed to seal up various kinds of leaks and better still covered the fiberglass with a surface that seems very similar to the hard rubber that is one of the two materials tanks like these are usually made of. (The other is stainless steel.) One can was enough to cover both tanks inside and out completely.

It is at this point that our tank building story slams smack into WPPD. The exposures were made as planned, two scenes, each one made once on x-ray film and once on standard RC enlarging paper. I hope to experiment more with paper negatives but while I know I can get an image with the stuff I haven't done the leg work needed to get the most out of it. My hopes were really pinned on the x-ray film shots. While the WPPD site accepts submissions until May 31st so long as they were taken on April 26th, I like the idea of putting results up as quickly as possible while it's recent enough that there's still a bit of a buzz going on. I should hasten to add here that there isn't any sort of contest going on, just a gallery of submissions from around the world made using anything from the latest pro DSLRs fitted with pinhole body caps to taped up toilet paper rolls. Though last pinhole day was also a work day for me, an afternoon start gave me the morning to shoot a roll (using my 120 pinhole camera) develop the film and get it scanned and posted that same day before leaving for work.

My WPPD 2014 submission, arguably a more successful image than this years.

While I couldn't start until after work this year I had it in mind to at least try to post same day again. I even decided to forgo the chance to get a few more exposures with the 4x5 after dinner to get started in the darkroom. The plan was to develop the x-ray film first and hang it to dry, then process the paper negatives in trays which I could then use to make contact prints of the xray film negatives. Though I only had two tanks instead of the usual requisite three I figured I could also use the large tub of water that was going to serve as the final wash as a water stop bath between developer an fix. A chinzy way of doing things to be sure but I wasn't looking for world class results. Flaws can certainly be charming in the world of pinhole photography and the image I chose would be seen alongside ones made with toilet paper roll cameras. Chemistry was mixed, safe lights went up (x-ray film can be handled under dim safe lights) and I was ready for action.

The trouble started when I poured the developer into the first tank. After the Leak Seal treatment I tested for leaks by filling one of the tanks with water, but that was the other tank. I hadn't considered that just because one tank was fine the other one might still leak, but I had a steadily growing pool of developer forming and not much time to decide what to do about it. I'd be lucky not to spill more than half of the developer on the floor if I tried to transfer everything into the other tank in near darkness. The trouble was I had only one tray, the rest were outside the room. I managed to get a good amount of developer in without significant spills, pouring the rest down the drain as the tank had a much larger capacity. Problem number two was that the eco-pro developer (an Xtol equivalent) I had diluted 1:3 didn't seem to be having any effect, there was no sign of an image forming at all after several minutes. To remedy the situation I added what seemed like a reasonable quantity of Dektol paper developer that was luckily within easy reach. No sense measuring anything this off the cuff and I was developing by inspection anyway. The Dektol did the trick. I transferred to the tub of water, dumped the developer mish mash and replaced with fixer and finished up as best I could. The results, predictably enough, were a couple of nicely scratched up 8x10 negatives, though that aside they actually didn't come out too bad. After this I managed to develop wash and hang the two paper negatives, but with the disappointment over the negatives and a mess in the darkroom to clean up I decided to abandon the thought of getting anything posted that night. Making contacts of the scratched up negatives didn't seem worth the bother either so in the end I wound up scanning the paper negatives, inverting them in Photoshop and submitting the one that seemed to work best for me.


I had two to chose from. The image I put in is of a semi-derelict house not far from where I work. This isn't the image I envisioned, but maybe it's not so bad. There's something about this place I've always been drawn to. Nobody has lived there for some time though obviously the property is being kept up to an extent The house itself leaves me with the impression that until it was abandoned whoever lived there did their best with limited means to keep it up, small and humble as it is with its asphalt siding and a major highway running through the back yard. Its unadorned facade beginning to crumble, missing windows that haven't already been boarded up, it bears these inevitable indignities with quiet grace. If this house were a person I imagine it to be an aging man who towards the end of a hard life still makes an effort to present himself in his best suit even though its been patched in a few places and is a size or two too large for him now.

The image isn't clean. It's a little askew and there are numerous marks and other defects that are especially evident in the sky, possibly the results of my efforts to cram enlarging paper into the edge retainers of a film holder that wasn't designed to take anything that thick. It's contrasty as would be expected with a straight paper negative like this. The version done on x-ray film shows detail in the sky which has been blown out here, and much more detail in the foreground that has pretty much just gone to black. These are all things I hope I'll learn to avoid should I begin to explore paper negatives more, but here it all seems to work, Like its subject the image presents itself simply, unabashedly despite its humble nature and the ravages it has suffered.

I've been keeping my eye on this little place, intending stop and photograph it on a day when the lighting or the mood seemed to suit the subject. I may yet return to photograph it by more conventional means when the conditions seem right for it, perhaps when there's a good mist hanging about or some particularly ominous clouds overhead. I could also pass by it next time and find it demolished.